Showing posts with label baking. Show all posts

Saturday, April 16, 2011

Easter buns

I do like a hot cross bun around easter & haven't been overly happy with the ones that I have been buying so decided to make my own. Many years ago I attempted making them with compeletely disastrous results, they were tiny, hard little almost inedible buns & given that I was veganising an existing recipe this time I wasn't expecting great results. So it was a nice surprise that these were incredibly easy & incredibly delicious. I left the crosses off so made them as plain easter buns rather than hot cross buns.

Hot Cross Buns (based on a recipe from Taste.com.au)

Ingredients (makes 16)
  •  1 1/2 cups warm soy milk
  •  2 tsp (7g/1 sachet) dried yeast
  •  1/4 cup caster sugar
  •  60g nuttelex, melted
  •  Egg replacer equivalent to one egg
  •  4 cups plain flour
  •  1 tsp salt
  •  3 tsp mixed spice
  •  1 1/2 cups raisins
  •  1/2 cup marmalade


Method

  1. Combine the milk, yeast and 1 tbs of sugar in a small bowl. Set aside in a warm, draught-free place for 10  minutes or until frothy.
  2. Combine the milk mixture, nuttelex and made up egg replacer in a jug and whisk to combine. Combine flour, salt, mixed spice and remaining sugar in a bowl. Add the raisins and stir to combine. Make a well in the centre. Pour in the milk mixture and use a wooden spoon to stir until just combined, then use your hands to bring the dough together.
  3. Turn onto a lightly floured surface and knead for 10-15 minutes or until smooth and elastic. Place the dough in a bowl and cover with a damp tea towel and place in a warm, draught-free place for 1 hour or until dough doubles in size.
  4. Preheat oven to 200°C. Grease a 23cm square cake pan. Punch the dough down with your fist. Turn dough onto a lightly floured surface and knead for 2-3 minutes or until dough is smooth and elastic. Divide dough into 16 even pieces and shape each portion into a ball. Arrange dough portions, side by side, in the prepared pan. Set aside in a warm, draught-free place for 30 minutes or until dough has risen 2cm.
  5. Bake in preheated oven for 10 minutes. Reduce heat to 180°C and bake for a further 20 minutes or until golden and cooked through (buns are ready when they sound hollow when tapped on the base).
  6. Turn onto a wire rack. Place the marmalade in a microwave safe bowl & microwave for 45 seconds or until melted. Brush hot marmalade over the buns. Enjoy with a cup of tea!

Tuesday, November 2, 2010

Vegan MoFo - Banana Bread


I have been doing some recipe testing for the lovely Carla from Easy as Vegan Pie recently & made her gluten free banana bread.  This recipe is such a winner!  Ever since I made it Greg has been not so subtly suggesting that I make it again because it was so good.  I don't often make the same thing twice but this is the second time I made this & it will now be my go to banana bread recipe.

Friday, June 25, 2010

Baked treats from my mum

Last Saturday I gave birth to my daughter Holly, she is absolutely amazing & life with her is fantastic.  So far I am coping pretty well with the broken sleep but have had a lot of help - Greg has been home so has been cleaning & organising meals & my mum brought over a care package of baked treats for us & for when we have visitors.

From the Joy of Vegan Baking she made pineapple walnut bars & banana chocolate chip muffins - yum.


And just because she is super adorable, this is Holly (everytime I look at that wrap she is in I think of Johanna from Green Gourmet Giraffe)

Thursday, June 17, 2010

Pineapple Upside Down Cake

I made a pineapple upside down cake using a recipe from Vegweb.  It was super quick, it literally took under 10 minutes from starting it to putting it in the oven, but I had some issues with the baking.  I took it out of the oven after 25 minutes when it looked perfectly golden brown, but when I inverted it on a plate it was completely uncooked inside so it went back in the oven for probably about another 20 or so minutes.  When I then read through the comments on the recipe it seems like a few other people had the same issue, not sure why?

Ingredients

  •     1 1/2 cups plain flour
  •     1 cup sugar (I would only use half a cup next time because it is a very sweet cake)
  •     1 teaspoon baking soda
  •     1/2 teaspoon salt
  •     1 cup pineapple juice/water (see below)
  •     1/3 cup oil (I used canola oil)
  •     1 tablespoon white vinegar (I used apple cider vinegar)
  •     1 can pineapple slices in unsweetened pineapple juice
  •     1/4 cup UNPACKED brown sugar (I would leave this out next time as it didn't caramelise like I   thought it would so seemed a bit unneccesary)

Directions:

  • Preheat oven to 180 degrees.
  • Mix flour, sugar, baking soda, and salt in a large bowl.
  • Pour juice off can of pineapple into 1 cup measuring cup--it should be about 3/4 cup juice.   Add water to make 1 cup.  In a separate bowl, combine oil, vinegar and juice.
  • Place pineapple slices into the bottom of a 12 inch spring form pan.   Sprinkle with brown sugar.
  • Quickly mix wet ingredients into dry, stirring quickly to combine ingredients well and get out the big lumps.  Pour into pan on top of the pineapple/brown sugar mix.
  • Bake for 25-35 minutes or until golden on top and a toothpick inserted in the center comes out clean. 
  • Let cool and loosen sides of cake from pan.  Remove side ring and place serving plate on top.   Flip cake over onto serving plate and remove pan bottom.


Wednesday, June 2, 2010

Coconut & Strawberry Sandwiches

I made the Coconut & Raspberry Sandwiches from the Vegan Indulgence cookbook a couple of weeks ago.  I didn't have raspberry jam so subbed strawberry & also made some with marmalade.  These are quite nice, the biscuit dough is a lot easier to work with than the melting moment dough so they were easier to shape & made lots (I think I got 19) but weren't so shortbready.  I am a big fan of these sort of sandwiched biscuits so will probably make these again.

Biscuit
1/2 cup vegan margarine
1/2 cup sugar
1/2 cup soy milk + 1 teaspoon vanilla extract
3/4 cup custard powder
1 1/2 cups self raising flour
1 cup shredded coconut

Filling
1/2 cup vegan margarine
1 1/2 cups icing sugar, sifted
3/4 cup shredded coconut
Raspberry jam (about 1/2 a jar) - I made some with strawberry & some with marmalade

Preheat oven to 160˚C/320˚F/Gas Mark 3. Line two biscuit trays with baking paper.
Biscuit
In a large bowl, beat margarine and sugar together until light and creamy. Carefully beat in vanilla soy milk.
In another bowl, sift flour and custard powder together. Fold into the margarine mixture until well combined.
Add coconut and mix through well. The mixture should be soft and slightly sticky, but you should be able to handle it without too much sticking to your hands.
Use two dessertspoons to form ovals of dough, about 5cm long. Place these on the baking tray, spaced out by about 5cm. Carefully flatten the ovals with the back of a flour-covered spoon to form a 1 cm thick slightly oval biscuit.
Bake for 30 minutes, until the biscuits begin to colour on their bases and are firm to the touch. Leave on the tray for another 10 minutes and then transfer to a cooling rack.

Filling
Beat margarine and icing sugar together until creamy and light. Fold in coconut until well combined. Chill in the fridge until the biscuits are cooled.

Putting it all together
Match up the biscuits to the most even pairs. Spread 1/2 teaspoon of coconut filling on all of the biscuits. Place 1/2 teaspoon of jam in the centre of the icing mixture on half of the biscuits. Carefully sandwich pairs together, using the edges of the coconut icing to join them together.
Keep in the fridge. These will keep for about a week.


Sunday, May 30, 2010

Bakery Style Berry Muffins

We have had a string of bad luck in our household recently so I haven't been online so much & am a bit behind with blog pots & haven't been doing cooking a whole lot of inspiring food anyway.
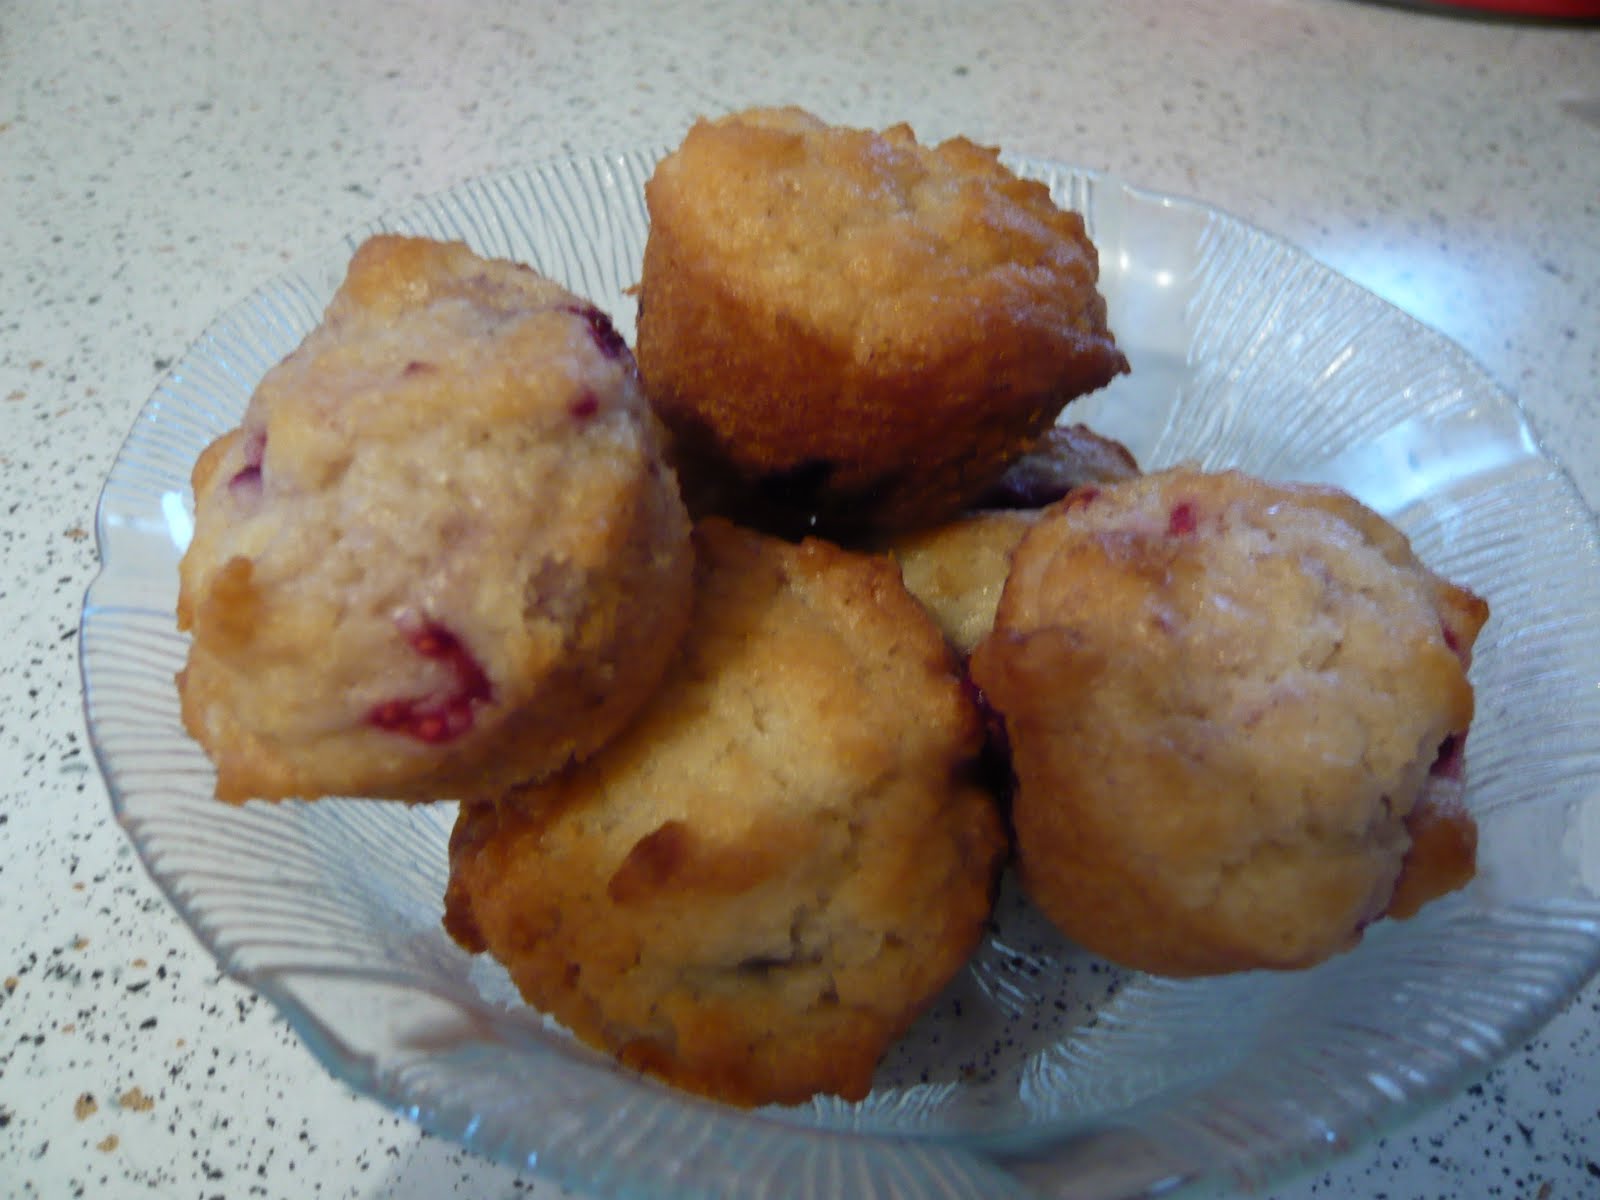
But, I have still been doing some baking & this week I made mini berry muffins using the recipe for Bakery Style Berry Muffins from Vegan Brunch.  These are really good, especially right out of the oven when they are crunchy on top.  For some reason my muffins always go soft when stored which I don't like so much. 
By far the worst thing that has happened in our household in the last week is that it looks like one of our cats is really, really sick.  He has gone from a seemingly perfectly healthy cat to looking like he will only be with us for a few more months.  Make sure you give your furry friends lots of cuddles & enjoy them while you can.

Tuesday, May 4, 2010

Vegan Brunch Toasted Coconut & Chocolate Chip Mini Muffins

These are actually the Toasted Coconut and Mango Muffins, but I didn't have any dried mango so I subbed some chocolate chips.  We bought a mini muffin tray for the cupcake kebabs & have been using it all the time since, I didn't make a whole lot of muffins or cupcakes beforehand because they are often too big but the mini muffin pan makes them perfect size for eating with a cup of tea & it makes heaps so you can't really go wrong!

This recipe is super easy & the toasted coconut flavour is delicious, they also feel healthier than a normal muffin with the addition of wholemeal flour & they don't have huge amounts of sugar in them.

Monday, May 3, 2010

Mediterranean Olive Bread

Whenever I make soup I like to make bread to go alongside it so when I recently made a delicious tomatoey vegetable & sausage soup I decided to also make Mediterranean olive bread from The Joy of Vegan Baking.  This bread is so, so good!  It is essentially savoury cake with rosemary, olives, sundried tomatoes & olives all through it.  It doesn't have yeast in it so is really quick & easy too for a weeknight meal.  Completely delicious & goes exceptionally well with soup.

The soup that I make is a very easy soup & a good way of using up lots of vegies - I chop up whatever vegies I have on hand & cook in a little bit of olive oil & add a tin of tomato soup & massel chicken stock until I have about 4 serves worth & this time I had some vegie sausages in the freezer so I chopped up some of them & added them as well.

Sunday, April 11, 2010

Easter treats

As I was seeing my family for Easter lunch I decided to make them some Easter treats.  I made the super easy & delicious cookies & cream truffles from Fat Feminist Foodie, but covered them in Sweet William milk chocolate & piped white chocolate crosses on them so they kinda looked like hot cross buns. I also made Sugar Cookies from 'The Joy of Vegan Baking' which I cut into Easter shaped & badly piped some icing on.  These biscuits were nice but they became super sweet with the icing.

Monday, April 5, 2010

Baking for the Aduki Vegan Bake Off

Last weekend was the Aduki Vegan Bake Off,  I had no idea what to make & on the day before decided to make White Chocolate & Cherry Blondies to enter into the slice category & Brownie Bite Cookies to enter into the biscuit category.  I make both on the Saturday morning & was not super happy with either, they were fine, but not winners.

I had some leftover blondies at home & were so much better the next day, oh well - we enjoyed them!  They are based on a recipe on taste.com.au but I did change it a bit, so my recipe is as follows:

Ingredients

  • 100g nuttelex, chopped
  • 180g Sweet William white chocolate, chopped
  • 1/2 cup caster sugar
  • Egg replacer made up to the equivalent of 2 eggs
  • 3/4 cup self-raising flour, sifted
  • 3/4 cup plain flour, sifted
  • 1 cup (175g) pitted cherries (I used canned morello cherries)

Method

  1. Preheat oven to 180°C/160°C fan-forced. Grease an 18cm x 28cm (base) rectangular slice pan. Line base and sides with baking paper, allowing a 2cm overhang on all sides. Melt nuttelex and chocolate in a medium saucepan over medium-low heat. Remove from heat. Set aside for 5 minutes to cool.
  2. Add sugar, made up egg replacer and flours to pan. Stir to combine. Spread into prepared pan. Press cherries into mixture. Bake for 30 minutes or until edges are firm and top golden. Cool in pan. Serve.


I wanted to make a really decadent biscuit so thought that the brownie bite cookies would be perfect - they are biscuits with chunks of brownie in them - genius!!  When these came out of the oven I thought that they were a disaster because they looked horrible, too big & they looked really dry, but they were deceptively delicious.

I used almost the exact recipe from Have Cake, Will Travel (that blog is amazing) but mine didn't look anywhere near as good as hers.

Ingredients


For the brownies:
  • 1/3 cup (75 g) nondairy butter
  • 1/2 cup plus 2 tablespoons (120 g) brown sugar
  • 1 teaspoon pure vanilla extract
  • 2 tablespoons (30 g) vanilla soy or other nondairy yogurt
  • 3/4 cup (90 g) light spelt or (94 g) all-purpose flour
  • 1/4 cup (20 g) unsweetened cocoa powder
  • 1/4 teaspoon baking powder
  • 1/8 teaspoon baking soda
  • 1/4 teaspoon fine sea salt
For the cookies:
  • 1/4 cup (180 ml) canola oil
  • 1 cup caster sugar
  • 2 tablespoons (30 ml) pure vanilla extract
  • 1/2 teaspoon fine sea salt
  • 1/4 cup plus 2 tablespoons (90 ml) plain soy or other nondairy milk
  • 3 cups (360 g) whole wheat pastry flour (I used plain white flour)
  • 1 1/2 teaspoons baking powder

Method

To make the brownies: Preheat oven to 350°F (180°C, or gas mark 4). Lightly coat an 8-inch (20-cm) square baking pan with non-stick cooking spray.
With an electric mixer, cream butter and Sucanat until light and fluffy.
Stir in vanilla and yogurt.
Sift flour, cocoa, baking powder, baking soda, and salt on top of the wet ingredients.
Stir dry ingredients into wet.
Place and level batter into prepared loaf pan.
Bake for 10 minutes, or until the sides of the brownie start to pull away from the pan.
Let cool in pan, on top of a wire rack, and chill before slicing. Cut into medium to large chunks. Set aside.
To make the cookies: Preheat oven to 350°F (180°C, or gas mark 4). Line two cookie sheets with parchment paper or silicone baking mats, such as Silpat.
In a large bowl, whisk together sugar, oil, vanilla, salt, and milk until combined.
Sift flour and baking powder on top of the wet ingredients.
Stir dry ingredients into wet.
Fold in brownie chunks, or use your hands to gently incorporate them.
Divide into 12 (about 1/4 cup each) portions of dough.
Flatten onto prepared cookie sheets: the cookies won’t spread much while baking, but leave 1 inch (2.5 cm) in between anyway.
Bake for 16 minutes. Wait a few minutes before transferring them to a wire rack to cool completely.
Yield: 12 cookies

Wednesday, December 30, 2009

Christmas Baking

I love mince pies & since I missed out last year I decided to make my own this year & they were yum. I based them on a recipe for orange mince pies from All Recipes.

The recipe is this, it did call for an egg wash before baking but I have left that out:

Ingredients

  • 1 3/4 cups (255g) plain flour
  • 1/4 cup icing sugar
  • 2 teaspoons ground cinnamon
  • 150g butter, softened
  • 2 tablespoons grated orange rind
  • 1/4 cup iced water
  • 3/4 cup bottled fruit mince
  • icing sugar for dusting

Preparation method

  1. Preheat oven to 200 degrees C.
  2. Sift together the flour, sugar and cinnamon into a large bowl. Rub in the butter until mixture resembles fine bread crumbs. Stir in the orange rind. Stir in enough iced water to make a soft dough. Knead dough on a flour surface for 1 minute or until smooth.
  3. Roll out to 5mm thick. Cut out approximately 18 x 7cm diameter circles, and 18 x 5cm circles, rerolling dough as needed.
  4. Line patty pan holes using the larger pastry circles. Fill each pastry cup with about 1 tablespoon of fruit mince. Top with smaller pastry circles, pinching circles together to seal the edges.
  5. Bake pies about 15 to 20 minutes or until golden. Cool slightly on wire racks. Dust with icing sugar just before serving.
Easy & delicious.


I also decided to make the cookies & cream truffles from Fat Feminist Foodie to go in with a friends christmas present. I dipped mine in Sweet William white chocolate which worked really well. These are crazy easy & delicious, I gave my friend a bag of about 10 & she ate them all straight away!


Saturday, July 11, 2009

Knishes


I read this post from "wanting kneading" & was very intrigued. I had never heard of knishes before, but these sounded really good so I decided to give them a go. These were the goods. They were easy to make & I absolutely loved both the dough & the filling. I am going to make this dough again to use for some sort of pie, maybe a creamy "chicken" & corn style.

I followed the recipe to the letter which is unusual for me & I am glad that I did because these were awesome & we happily ate them for lunch for the next two days as well.